ComfyUI Basic Usage: First Generation & Core Nodes
This section walks you through your first image generation workflow in ComfyUI and explains the core nodes that power all workflows—understanding these nodes is key to customizing your own generation pipelines.
First Generation of load workflow (Text-to-Image Workflow)
In the new version of comfyui, you should click template -> getting started -> text-to-image workflow(new).
note: If you not find the template, please check your comfyui version. The text-to-image workflow is only available in the new version. Or just choose purple image-to-image workflow.

Step-by-Step Guide
- Resolve Missing Model Error
On first launch, ComfyUI will throw a "missing model" error (this is normal—no pre-installed models by default). Locate the Download button (if your computer has 8 vram or less skip it and click fp8-version model ,i will introduce you fp8-version model for you ) and click it. Comfyui will automaticly download.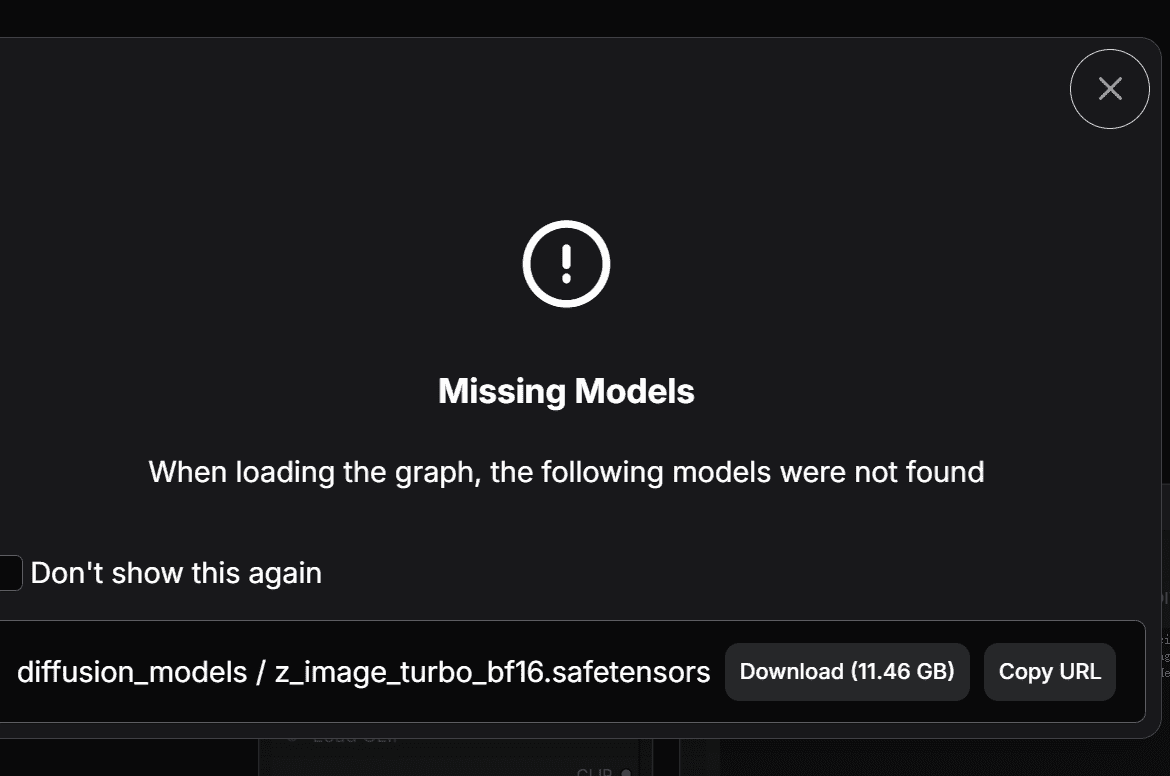
- Since I have already downloaded VAE model and Clip model, only the diffusion model error appears in this image.
- If the auto-download fails, manually download models from this part of piacture,there are three download links. And this part tells you the right folder you should put models in.
- Run the Workflow
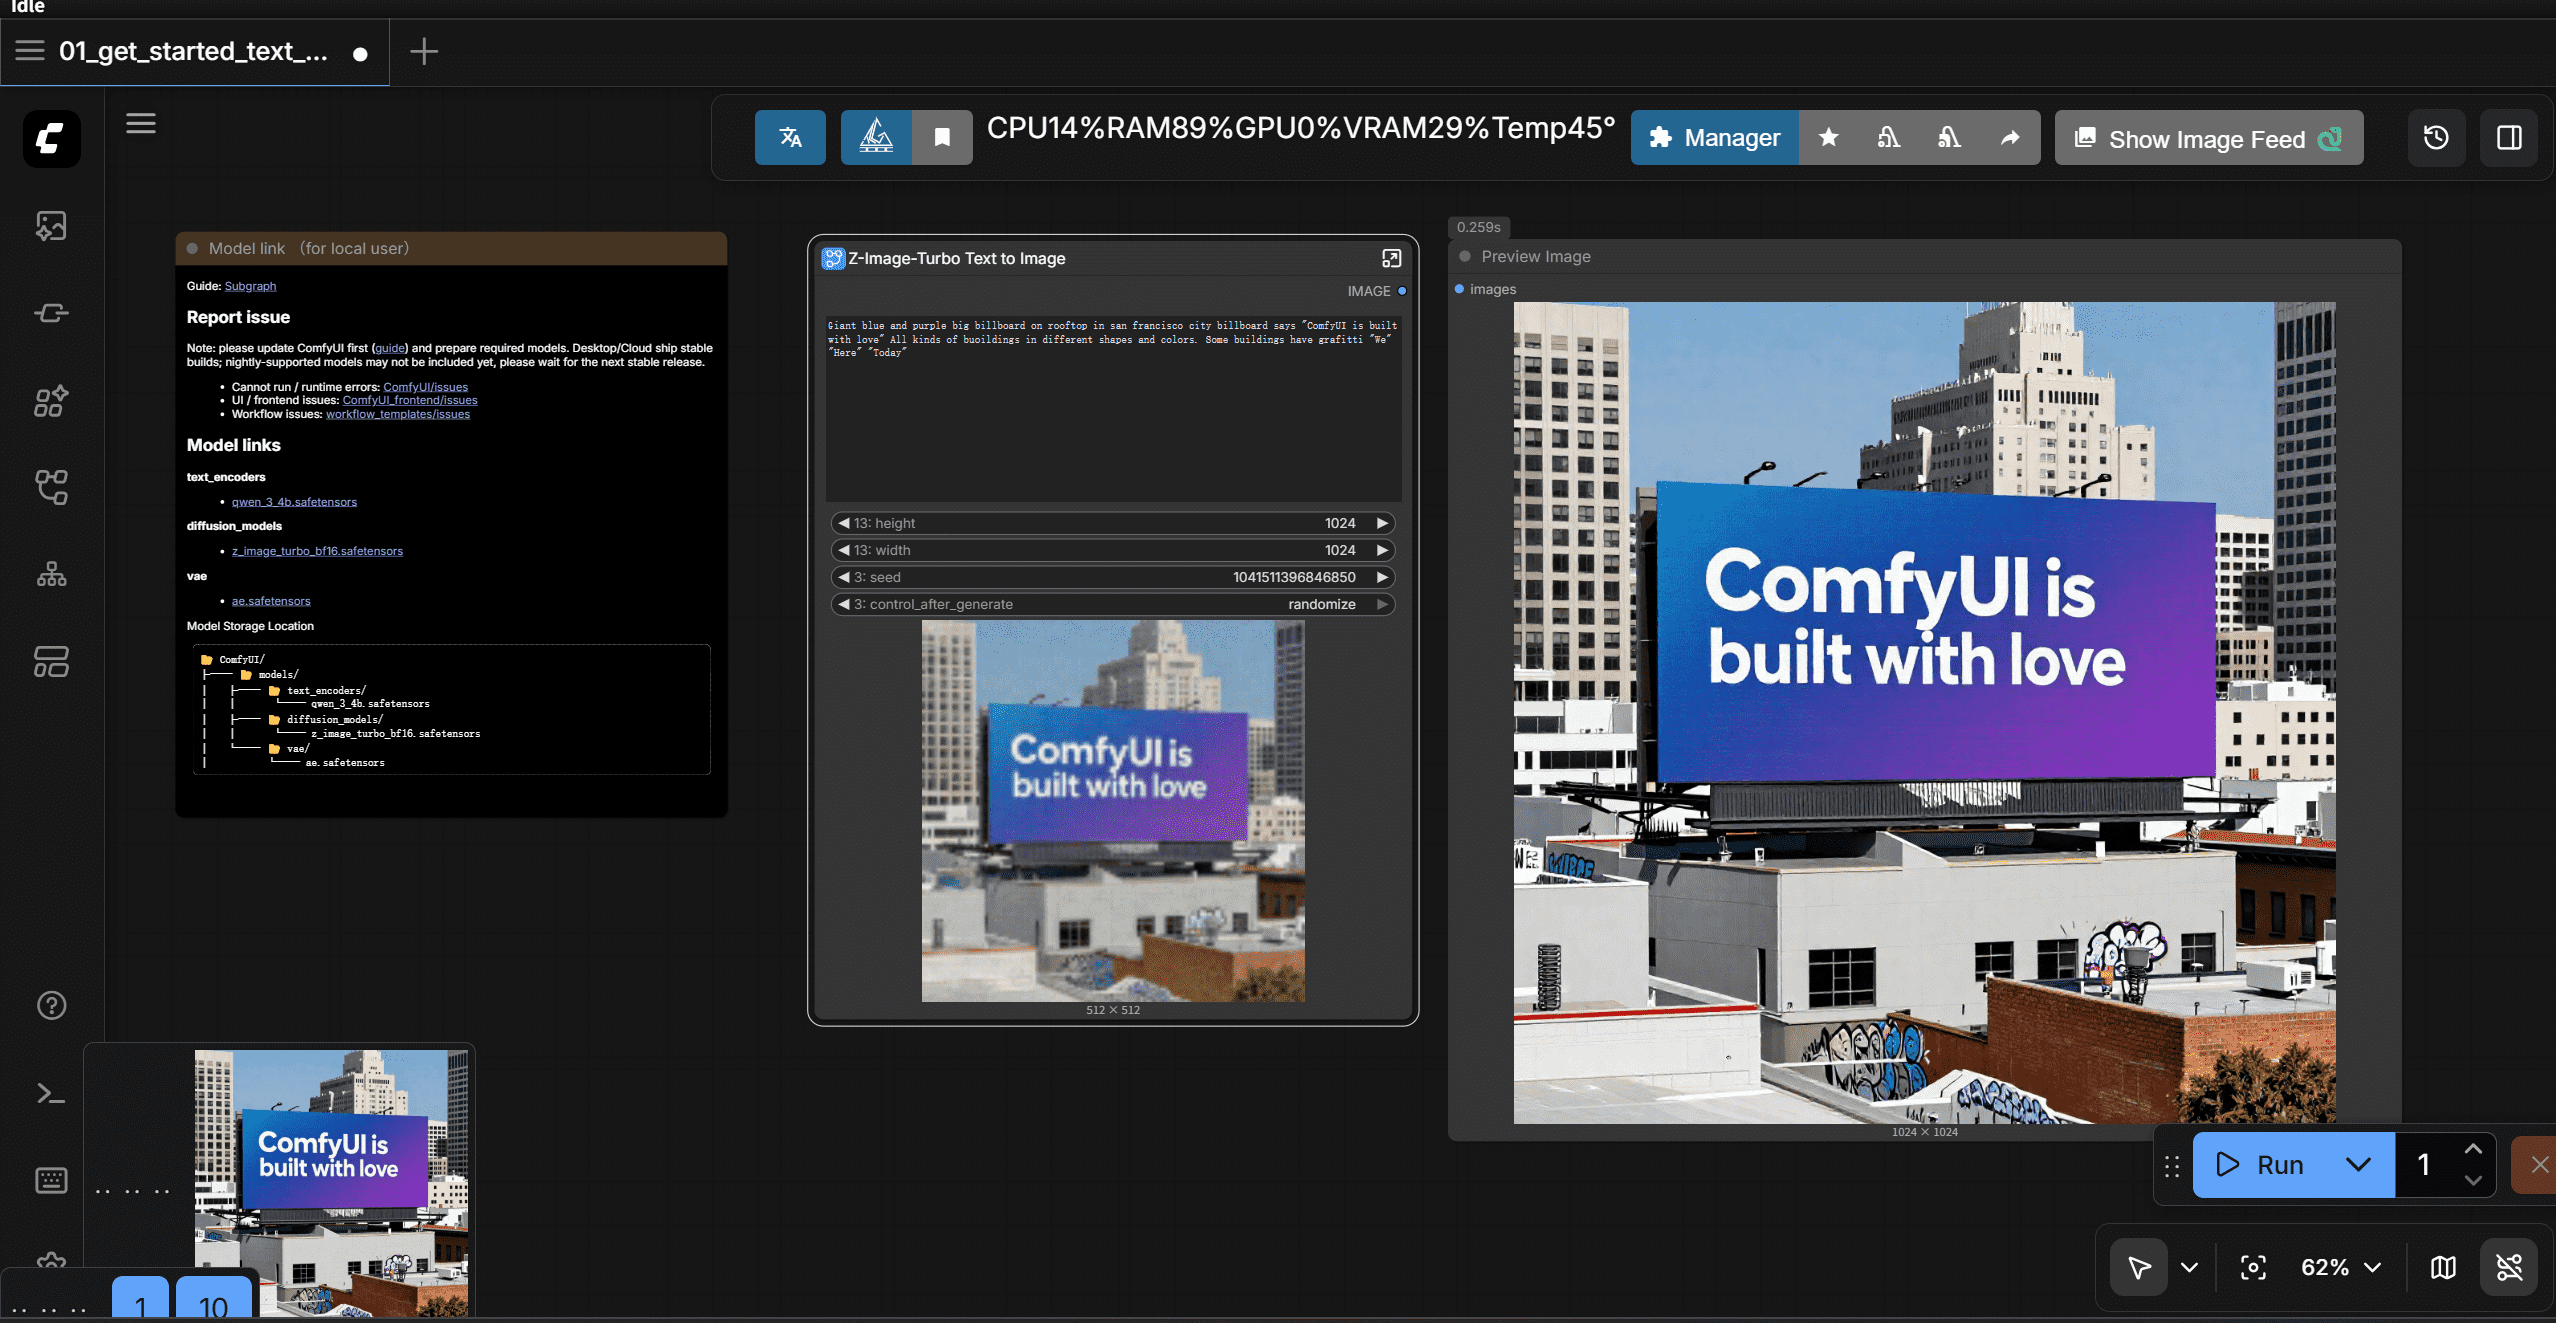
After the model is downloaded, choose the diffusion model ,vae,clip model and click the blue "Run" button to start generation. - Access Generated Images
All generated images are automatically saved to:- a folder named "assets" in the left-side navigator;
- Local file path in the computer:
ComfyUI/output.
Quick Tips for First Generation
- If the Run button is grayed out: Ensure all required models are downloaded and no red error prompts are visible.
- Generation speed: NVIDIA GPUs with CUDA support are fastest (AMD GPUs need ROCm setup; CPU-only generation is very slow).
Basic Nodes: Building Blocks of ComfyUI
Now that you’ve generated your first image, let’s break down the core nodes in workflow. because of the simplify interface, open the folder of ...u can see nodes. these are the core working nodes
What is a Node?
Nodes are the black rectangular blocks on the ComfyUI canvas. Each node has:
- Inputs: Data/parameters fed into the node (e.g., text, model, vectors);
- Outputs: Processed data passed to other nodes (connected via colored lines);
- Parameters: Customizable settings (e.g. image resolution, text prompts).
Core Nodes Explained
| Node Name | Key Function & Usage |
|---|---|
| Load diffusion model | - Loads pre-trained AI models (z-image-turbo) from the diffusion folder. |
| Load clip model | - Loads pre-trained AI models (z-image-turbo-clip) from the clip folder. |
| Load vae model | - Loads pre-trained AI models (z-image-turbo-vae) from the vae folder. |
| emptySD3latentimage | - Create a blank latent image with the size you set.it just some high-dimensional vectors.it just like raw and unprocessed meat. - Customize parameters: Adjust width/height (e.g., 512x512, 1024x1024) to set image resolution.- Note: Every model has its own recommonded latent size (e.g., SD 1.5: 512x512, SD XL: 1024x1024). More advanced models can handle more resolutions. |
| CLIP Text Encoder(prompts) | - Converts human-readable text into numerical vectors the model can understand. - Two variants: 1. Positive CLIP: Input what you WANT to generate (e.g., "a cat, sit, couch, realistic, 4k").You can directly use sentance like "a cat sit on a couch" to enter. |
| Conditioning ZeroOut | - Due to ksampler must have a negative prompt input, Zero out the negative CLIP vectors to ensure the model generates images based on the positive prompts only. |
| ModelSamplingAuraFlow | - Model Sampling Aura Flow is a sampler that uses the AuraFlow algorithm to generate images. |
| KSampler | - Takes inputs (model, CLIP vectors, blank latent image) and runs the diffusion process to generate new vectors (the "raw data" of the image). - Key parameters: Sampler type (e.g., Euler, DPM++), steps (higher = more detail, slower). |
| VAE Decoder | - Converts the numerical vectors output by the KSampler into a visible image (reverse of the encoding process). - Fixes: If images are distorted, switch to a standalone VAE model in the Load Checkpoint node. |
| Save Images | - Saves the decoded image from the VAE to your local device (auto-saved to ComfyUI/output). |
How Nodes Work Together (Simplified)
- Load diffusion model provide the model
- Load clip model provide the clip model
- Load vae model provide the vae model
- CLIP Text Encoder converts your prompts into usable vectors and passes them to the KSampler;
- Empty Latent Image passes a blank vector "canvas" to the KSampler;
- KSampler processes all inputs to generate new image vectors;
- VAE Decoder turns vectors into a visible image;
- Save Images stores the final image locally.
Dive into important nodes
KSampler
- seed: the first parameter is seed, comfyui use different seed to generate different images.
- control after generate: It applies to seed ,default by random. But you can choose increment ,decrement or fixed。 Which means you can keep the same seed to generate the same image. Or just a little change using increment or decement. So what is used for? In my opinion, This ensures you can reproduce a liitle bit different image every time jusst change the prompt or cfg_value.
- step: the number of steps to generate the image. The higher the number, slower but more detail. The lower the number, faster but less detail. BUT, for some advanced model, the developer by enhancing model performance and use some tricks like lora, make it possible to generate high-quality images with fewer steps.
- CFG: stands for Classifier-Free Guidance. It controls how strongly the model follows your text prompt. But some distilled models don't follow this rule. So, you need figure how to use it by yourself.
- Sampler Name The sampler name defines the denoising algorithm used by the model to gradually transform random noise into a final image. It directly affects generation speed, stability, detail quality, and creative variation. Common samplers: euler, euler_ancestral, dpmpp_2m_sde, lcm, turbo.
- Scheduler The scheduler controls the noise step size at each sampling step—it determines how much noise is removed at each iteration. It works with the sampler to optimize denoising progression. karras is the most popular and stable scheduler for general use.
- Denoise Denoise controls the strength of image regeneration, ranging from 0 to 1. 1.0: full regeneration from pure noise (txt2img) 0: no change, output the original image Values between 0 and 1: partial redraw for img2img, refinement, or style transfer.