Nodes Introduction
A node is the basic building block in ComfyUI.Each node handles one specific task — like loading models, setting parameters, sampling, or outputting images.Nodes connect with each other to build a complete workflow, making AI image generation modular and easy to edit.
1. Accessing Nodes (How to Open the Node Menu)
ComfyUI offers multiple intuitive ways to access the full list of installed nodes (critical for building custom workflows):
- Double-click blank canvas
Double-click any empty area of the ComfyUI interface—this opens the full node browser (sorted by category, e.g., "conditioning", "latent", "image"). - Right-click blank canvas
Right-click empty space and select "Add Node" from the context menu to open the node browser (same as double-click, but more flexible for touchpad users). - Drag from a node’s output slot
Open the show link function (top navigation bar → "Show Links") to show the link between nodes. Click and drag the small dot (output slot) of an existing node to an empty area—this opens a filtered node menu showing only nodes compatible with that output type (e.g., dragging a CLIP output will show nodes that accept CLIP inputs).
2. Installing Custom Nodes (Expand ComfyUI’s Capabilities)
The default nodes are limited—installing custom nodes unlocks advanced features (e.g., control net, image editing, style transfer). Here’s how to do it:
Step-by-Step Installation
- Open the Manager (top navigation bar → "Manager" or "Custom Nodes Manager");
- In the "Custom Nodes Manager" tab:
- Search & install specific nodes: Use the search bar to find nodes (e.g., "Efficiency Nodes", "ComfyUI-Image-Utils") and click "Install"—ComfyUI auto-downloads and installs them.
- Install missing nodes: Click the "Install Missing Custom Nodes" button to auto-install all nodes referenced in your workflow but not yet installed (perfect for importing shared workflows).
- Critical Step: Restart ComfyUI after installation—new nodes will not appear in the node menu until you restart the software.
Recommended Custom Nodes for Beginners
- efficiency-nodes-comfyui: Adds time-saving tools (e.g., batch image processing, prompt templates);
- ComfyUI Impact Pack: Adds advanced image editing and style adjustment features.
often used nodes
- preview image: shows the image output of the node in the canvas and not saved.
some difference you should know
some node seems like the same in function, but may be incompatible.
- Such as
Empty Latentvs.Empty SD3 Latent- Empty Latent Image: The standard 4-channel latent space used for SD 1.5 and SDXL.
- Empty SD3 Latent Image: A 16-channel latent space specifically designed for the higher information density of SD3 and Flux.(advanced models may need)
- so do not misuse
3. Practical Node Interface Operations
Collapsing Nodes (Clean Up the Canvas)
Each node has a gray circle/arrow in the top-right corner—click it to collapse the node (hides input/output slots and parameters, leaving only the node name).
- This does NOT disable the node (the workflow still runs normally);
- Use this to reduce clutter when working with large workflows (e.g., 50+ nodes).
Right-Click Node Options (Customize Node Behavior)
Right-click any node to access these useful options:
- Bypass: !important! Temporarily disable the node (the workflow skips it, passing input directly to output)—great for testing if a node is causing errors;
- Change Color: Assign a color to the node (e.g., red for KSampler, blue for CLIP nodes) to group related nodes visually;
- Fix Node: Locks the node in place (prevents accidental dragging/moving) – useful for critical nodes in complex workflows;
- Delete: Removes the node from the canvas (use carefully—broken connections will cause workflow errors);
- Duplicate: Creates a copy of the node (saves time when reusing the same node with similar parameters).
Quick Tip
Use keyboard shortcuts to speed up operations:
Delete: Delete a selected node;Ctrl+ mouse drag : select multiple nodes at once and you can click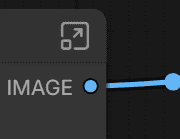 to use subgraph function.
Ctrl+C/Ctrl+V: Copy/paste nodes (works for multiple selected nodes too);Ctrl+Z: Undo last node action (e.g., accidental deletion).Ctrl+G: Group selected nodes (useful for organizing complex workflows).Ctrl+B:bypass the selected nodes and make them not work.